What is a security key?
A security key is a device that can be used for authentication (verifying your identity). A common type of security key is a USB that gets plugged into your computer. Some may even have NFC or Bluetooth capabilities that allow you to verify your identity through tapping or having the key nearby your device rather than or in addition to plugging in.
What security key can I use and how do I get one?
In order to use a security key as an authentication method with Azure MFA, you will need what is called a FIDO2 security key. One of the most reputable companies for security keys is Yubico.
When getting a security key, you need to consider what USB ports you have available on your computer. In general, if you have a Windows PC, you will want a USB-A security key, and if you have a Mac, you will want a USB-C security key.
Here are our recommendations for security keys:
- USB-A:
- USB-C:
As a student/alumni, you will generally be responsible yourself for buying and ordering your own security key if you would like to add it as an additional authentication method. However, current students may request a security key through your school for the following reasons:
- If you do not have a mobile phone to use for MFA
- If you need an accommodation related to a documented disability
To make these requests, you will need to contact your school's student support services. They will determine whether to approve your request or not based on your needs.
Is a security key right for me?
Consideration 1: Is my device/browser supported for security key sign-in?
One of the first considerations you must make is if a key will work with your computer/device and internet browsers. If you are using a Yubico security key, please consult the following tables for current supported devices and browsers.
Supported devices for security key sign-in
| Supported | Not Supported |
| Windows, Mac, Linux computers | Chromebooks or any mobile device (Android, iPhone/iPad) |
Supported browsers for security key sign-in
| Supported | Not Supported |
| Chrome -- on Windows/Mac/Linux Edge -- on Windows/Mac Firefox -- on Windows |
Safari |
Please note: If you still feel like you would like to use a security key for your supported computer, you can always use a different authentication method on your mobile device if you have enrolled in another method (e.g. phone text / call). That way, you can still sign-in to your account on mobile. Check out this article for enrolling other authentication methods.
Consideration 2: Will I be okay with keeping track of a security key?
One of the biggest considerations you need to make is whether or not you would like to balance the extra security and convenience of signing in with a security key with the responsibility of keeping track of an additional device. If you ever lose your security key, you will have to spend extra time and money to obtain and transition to a new key.
Consideration 3: Is a security key the best option for my needs?
Lastly, you will need to consider whether a security key is the best option for your needs. If you don't have a mobile phone to use for MFA, a security key may be your best option. Otherwise, if you do have a mobile phone, try out the call and text methods first to see if they work for you. Specifically, see if the call option works as it is the simplest option for MFA, only requiring you to answer a phone call and press the pound key to verify your identity. If those methods are not working for your needs and you have a supported device (see tables above), then a security key may be a good option for you.
The process for signing in with a security key involves plugging in the security key (or perhaps bringing it near your device if you are able to use NFC capabilities) and entering your PIN code. To get a better sense of this process and how it compares to signing-in with other methods, please check out this article on how to sign-in.
How do I enroll a security key for Azure multi-factor authentication (MFA) for students?
- Navigate to https://mysignins.microsoft.com/security-info
- Enter your school email address and click Next.

- Enter your password and click Sign In.

- You will then be directed to a screen asking if you would like to stay signed in. Check Don't show this again to stop this message from popping up on this device. Then, click No if the computer you are using is a public machine, or click Yes if you are using a trusted personal device and would like to reduce how many times you are asked to sign in.

- Once you finish signing in, you will see the Security info page in Microsoft's My Sign-Ins website for your account. On this page, you will see a white box with a button on the top that says Add method. If you have no methods enrolled for MFA, you will see "No items to display." under Add method. (See example image of no methods enrolled below.)

Otherwise, if you have at least one method enrolled in MFA, you will see a list of your methods. (See example image of a phone and authenticator app enrolled below.)
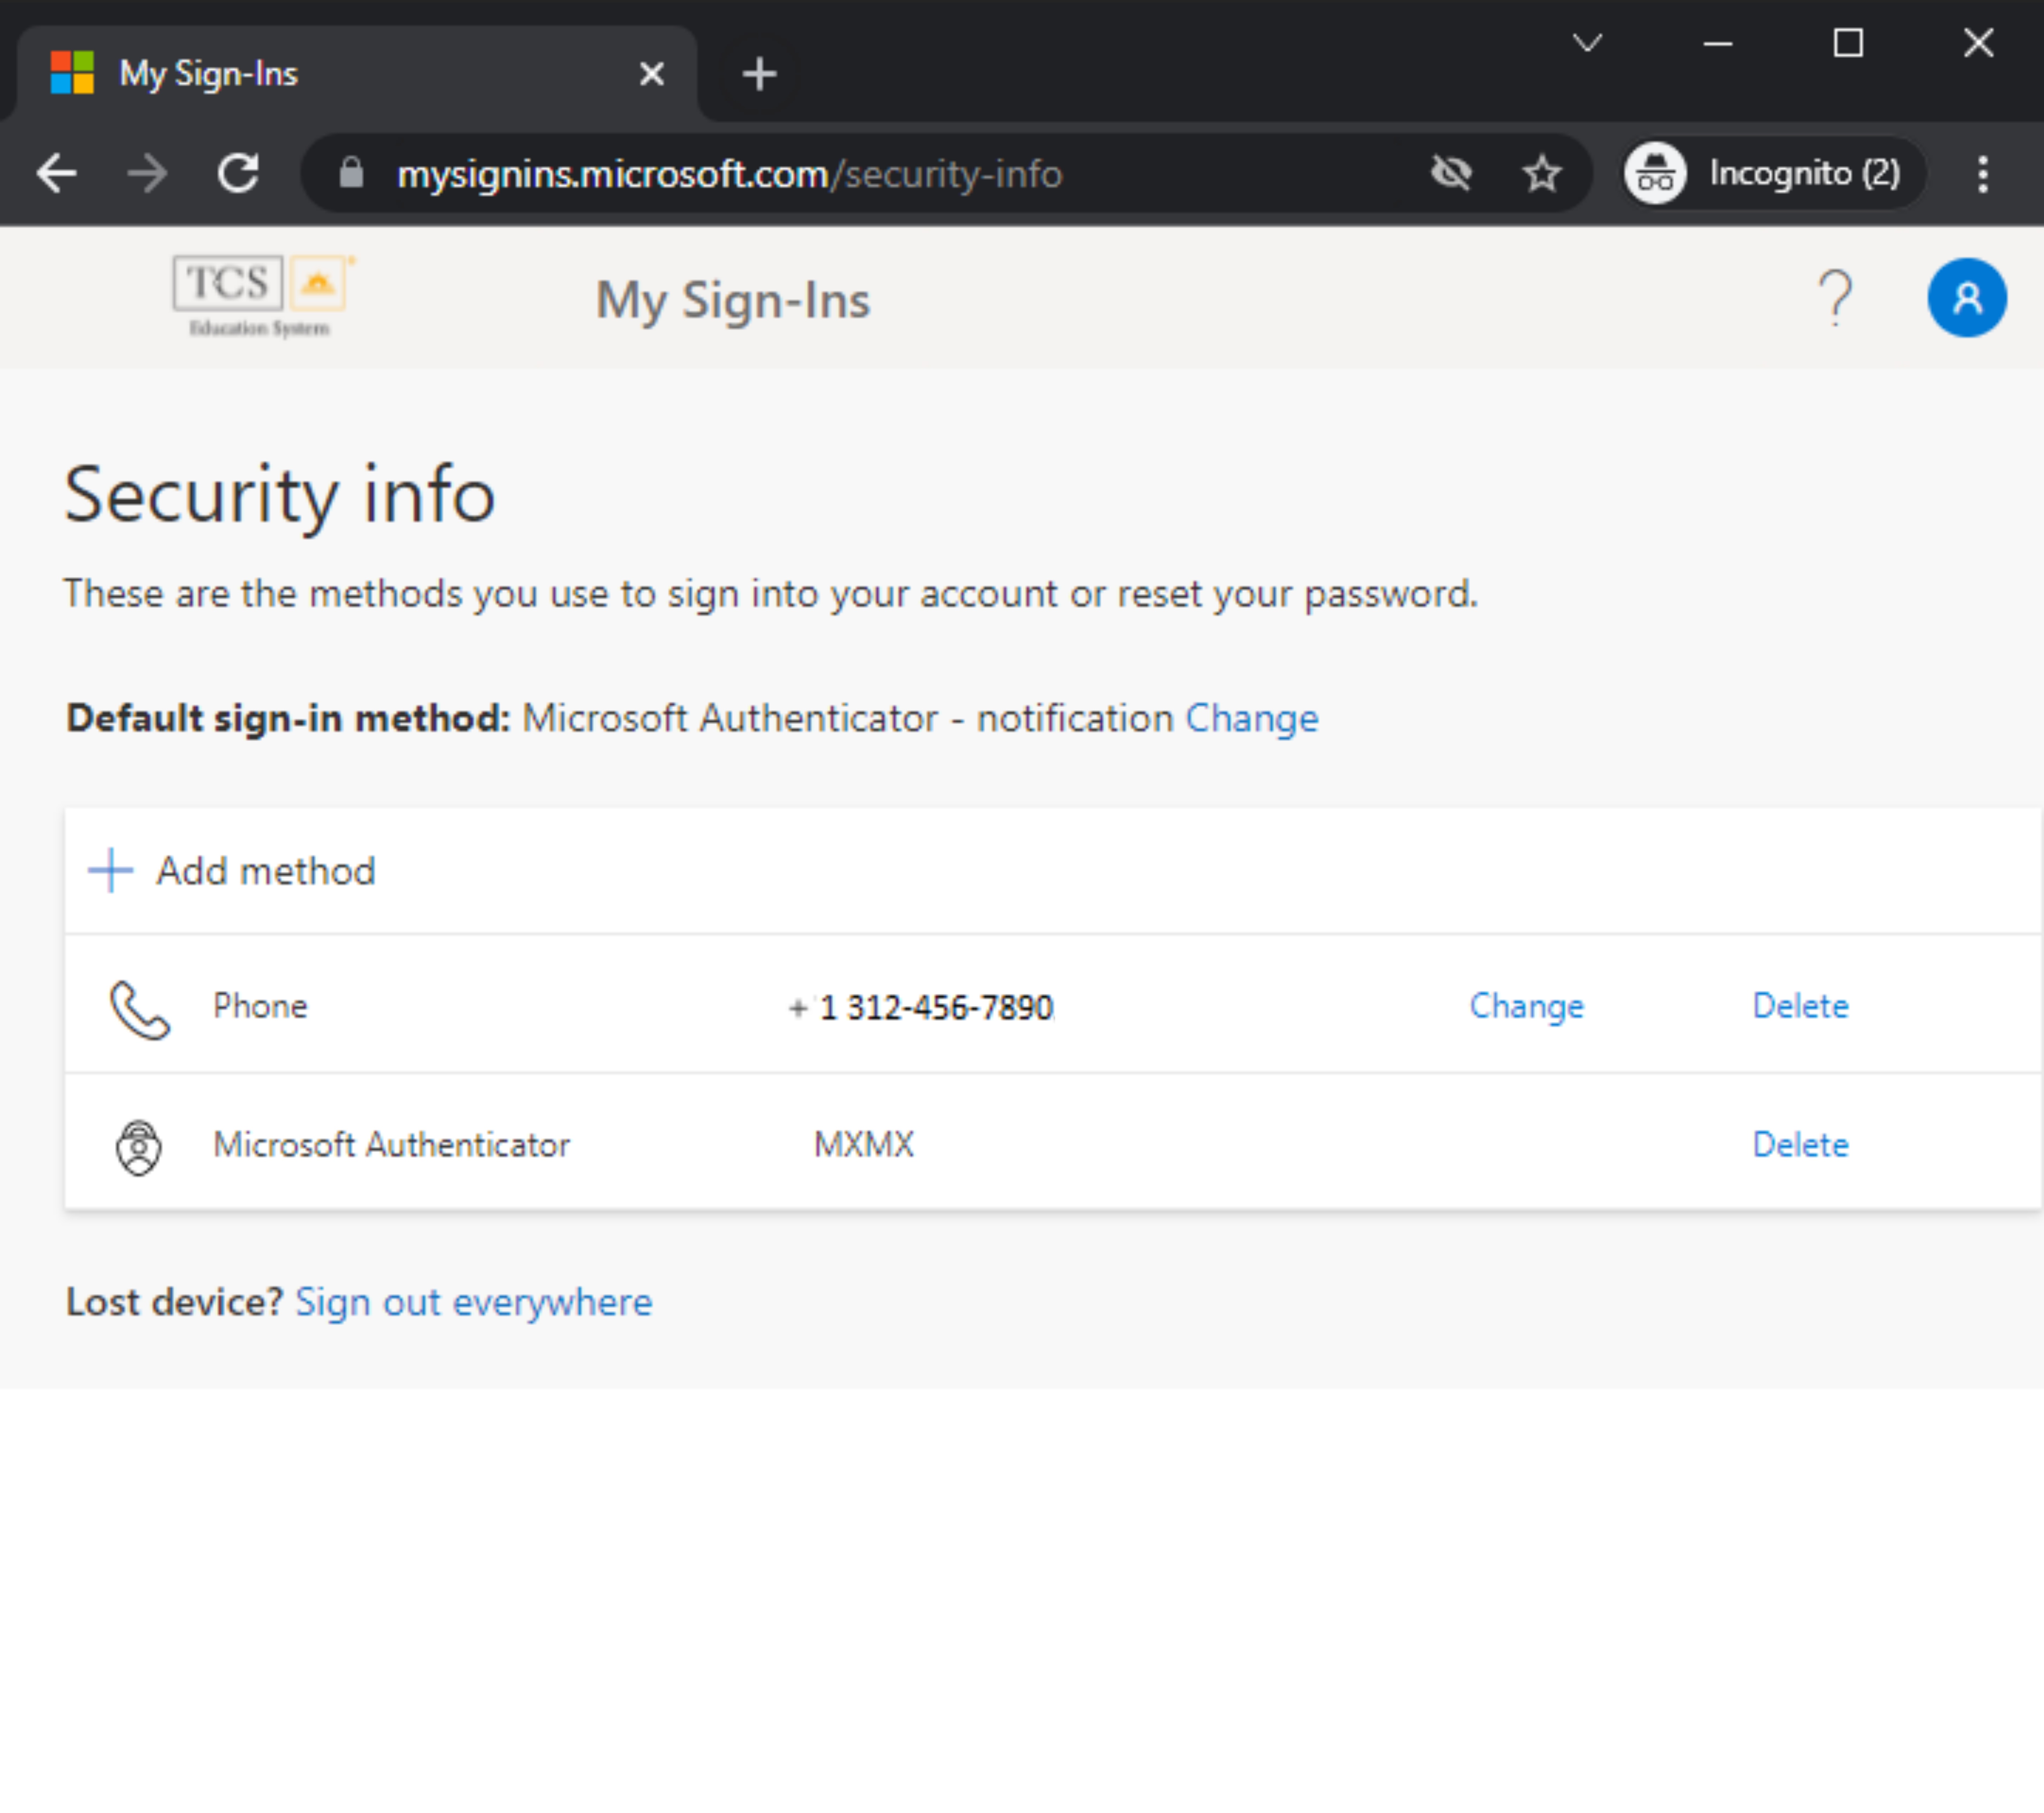
- To add a new MFA method, click Add method.
Note: If you have at least one method enrolled in MFA, you will also see Default sign-in method below the Security info heading. If you do see this, then you will see the default sign-in method that is currently set for your account next to it. See this article for more info on what this means and how to change your default sign-in method.
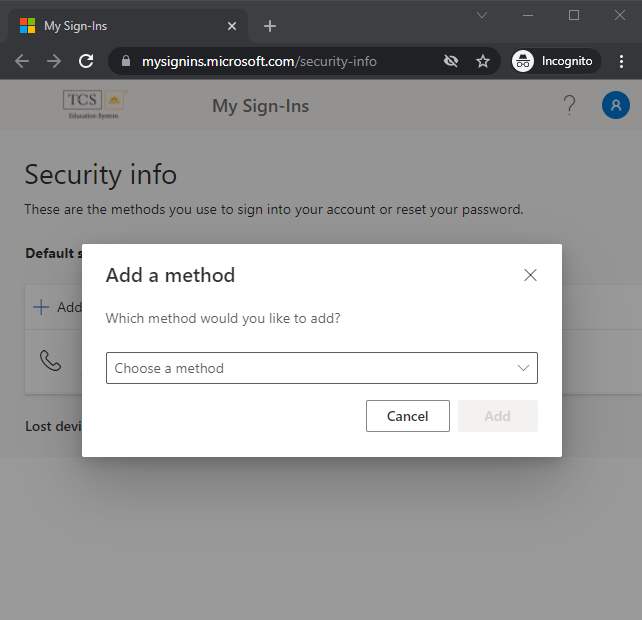
- A pop up will show asking you which method you would like to add. Click the dropdown labeled Choose a method.
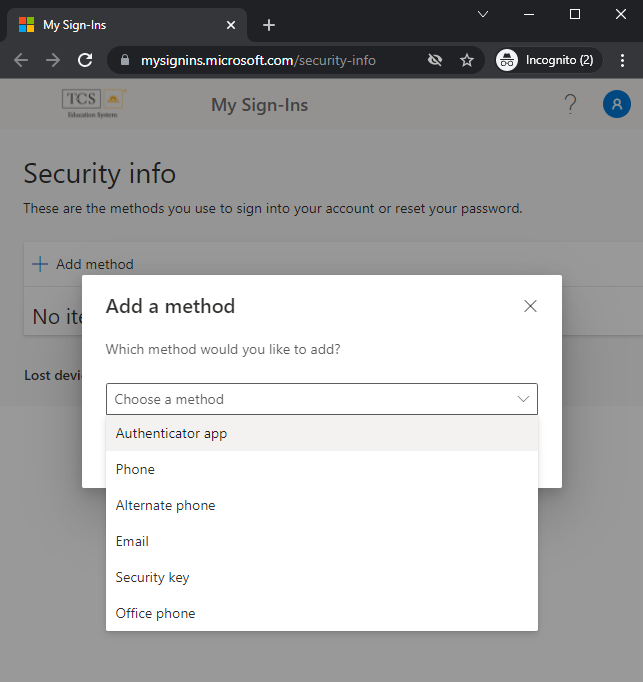
- In the dropdown, select Security Key from the list of authentication methods.
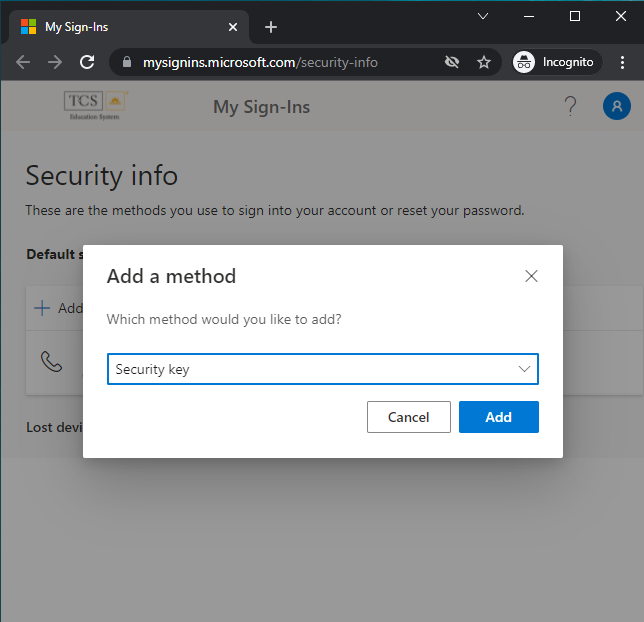
- Click Add.
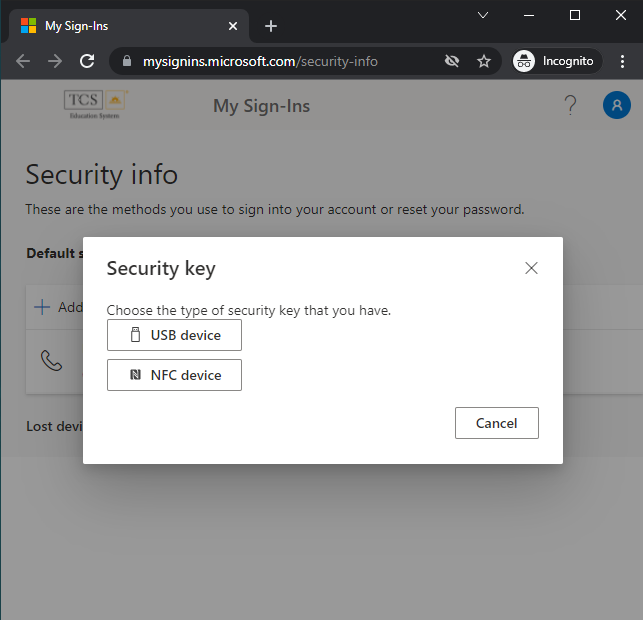
- You will be asked to choose the type of security key you have. Select USB Device.
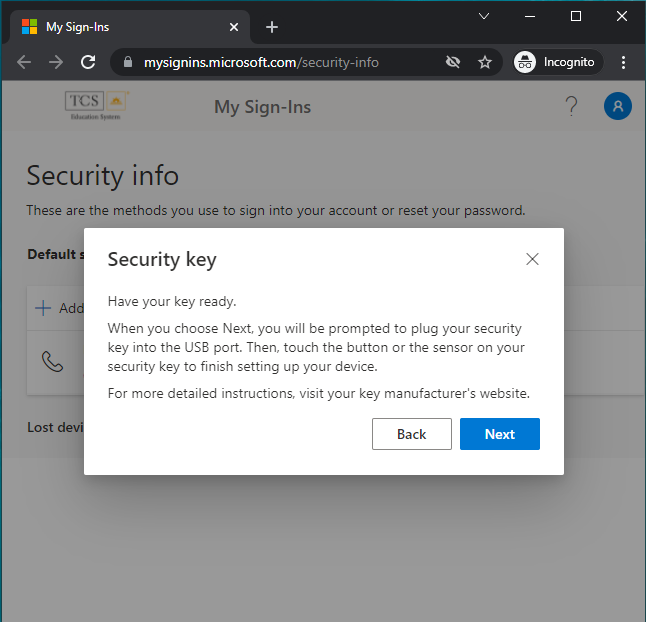
- A message will show telling you to get your key ready and that when you proceed, you will need to plug in your key and touch the key to set it up. Click Next.
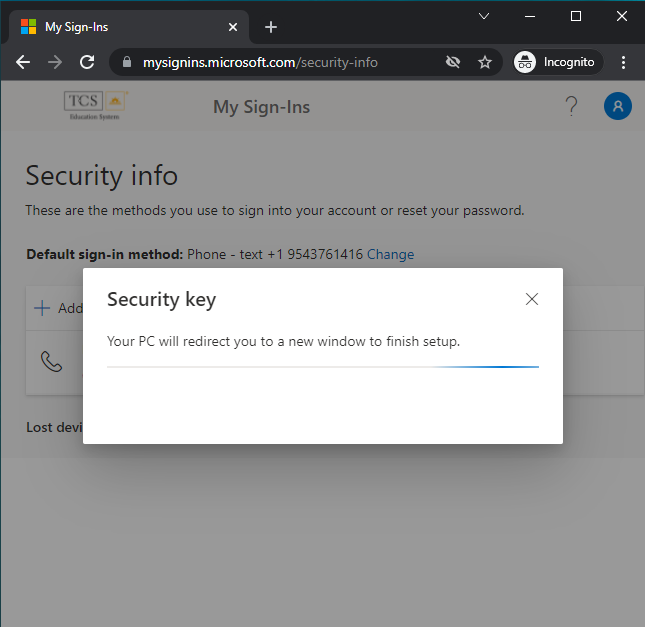
- A notification will show indicating that your computer will redirect you to finish the security key setup.
- Click Next to continue setting up the security key.
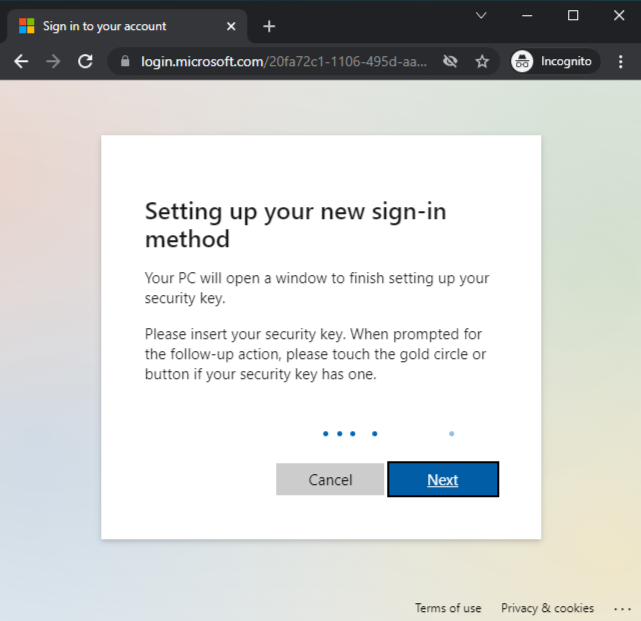 |
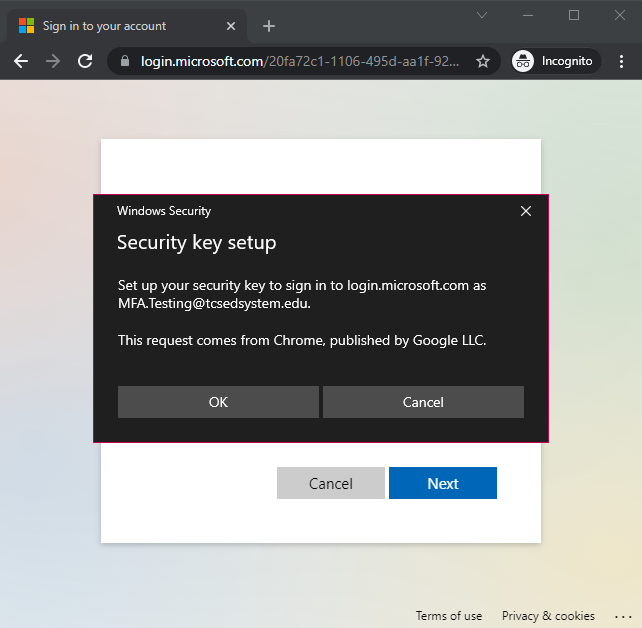
| - Your computer will show a message for setting up your security key. Click OK.
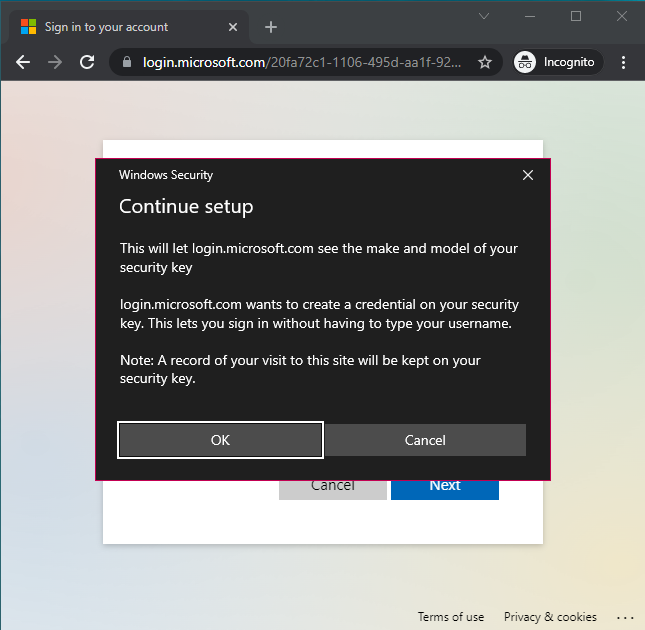
- Your computer will then ask for permission to see the make and model of your security key so that it can continue setup. Click OK.
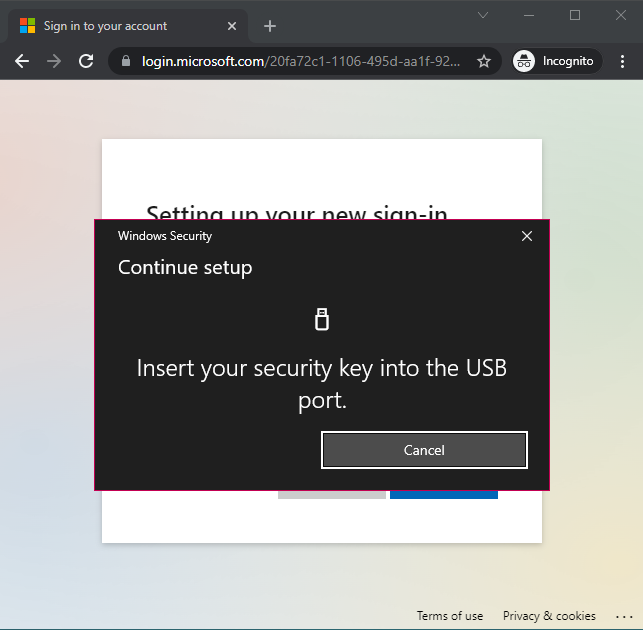
- Your computer will check to make sure the security key is properly plugged in. If your security key is not plugged into the computer, you will receive a prompt to insert your security key into the USB port.
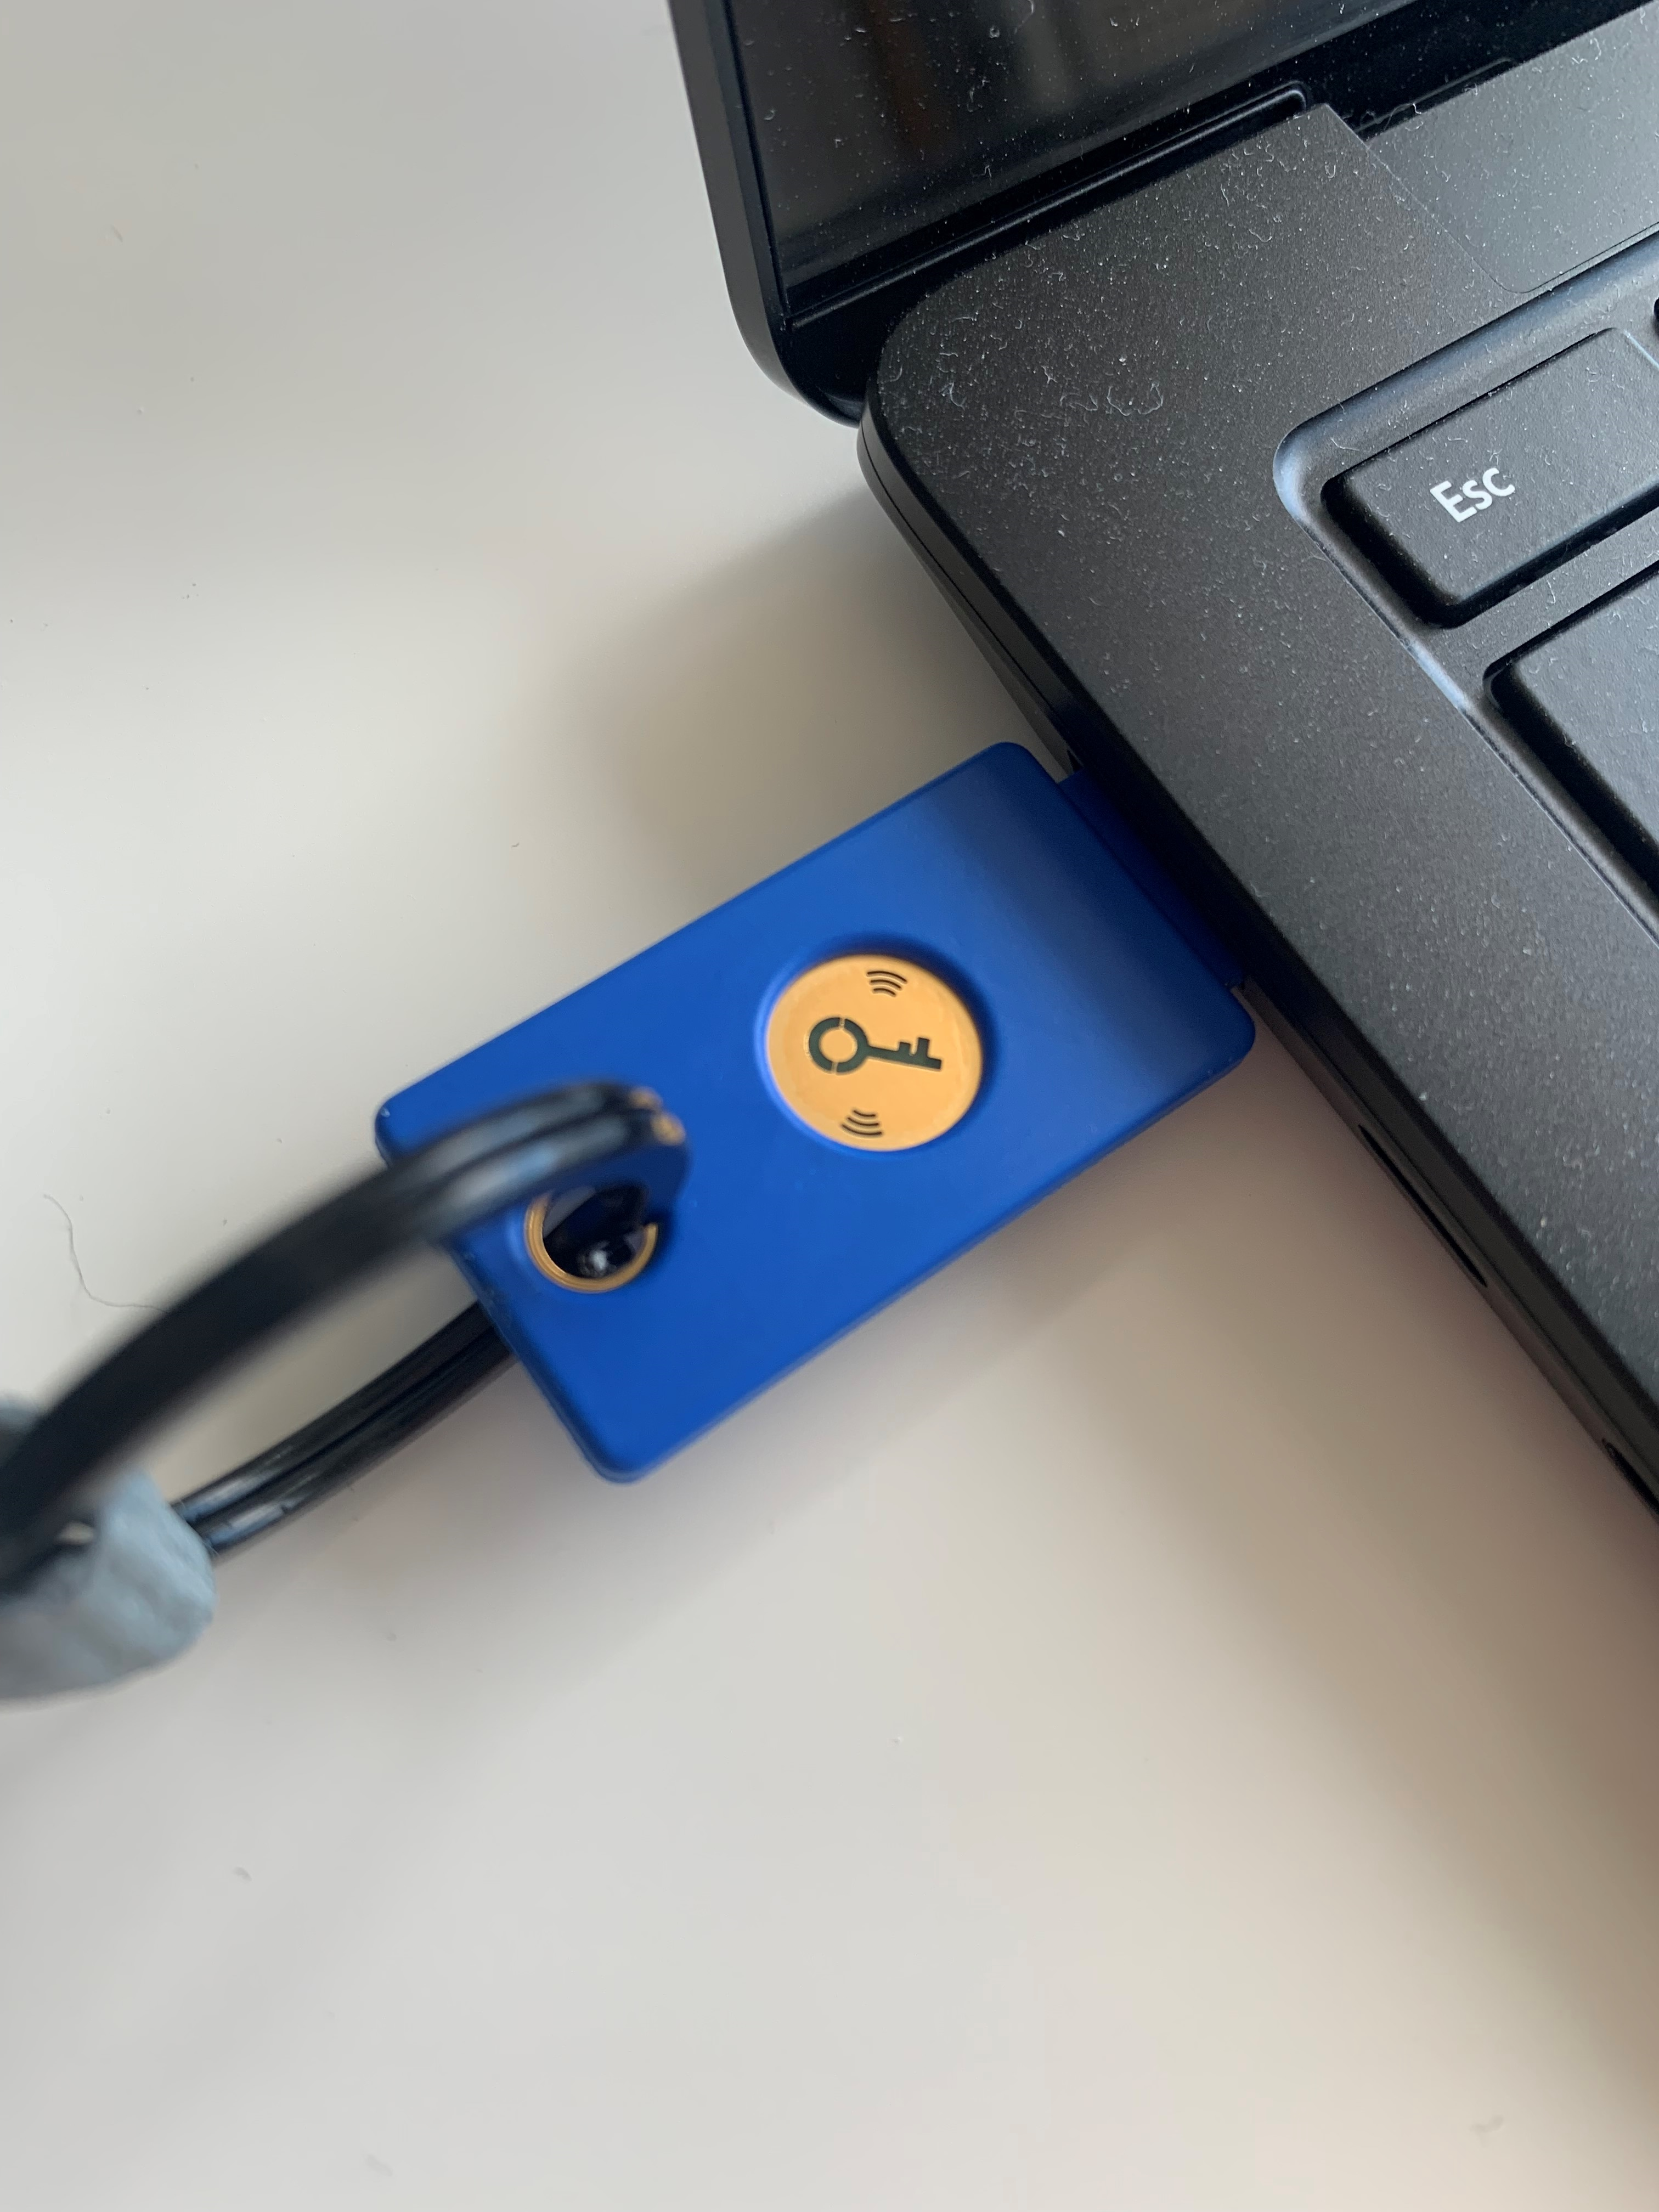
- If it isn't already plugged in, plug your security key into the appropriate USB port for your key and computer (either USB-A or USB-C port).
- You will be prompted to enter a PIN. After you have finished setting up your security key, your PIN and the security key will be needed to gain access to your account. Enter a memorable PIN in the text box.
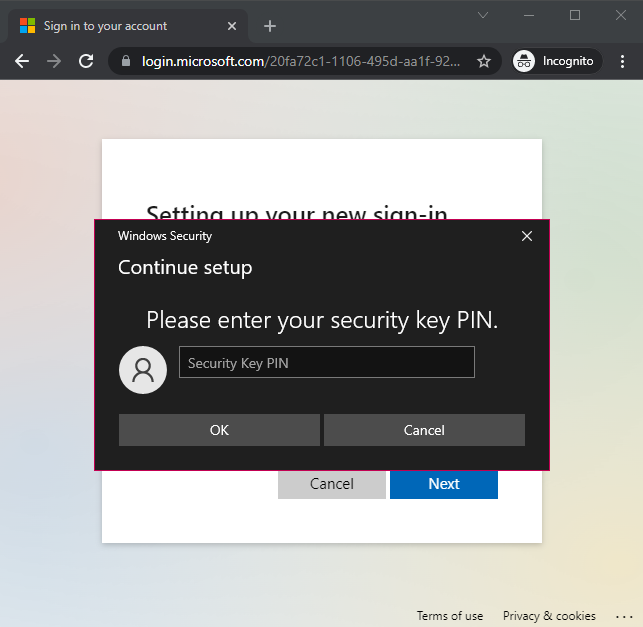
- Once you have entered your desired PIN, click OK.
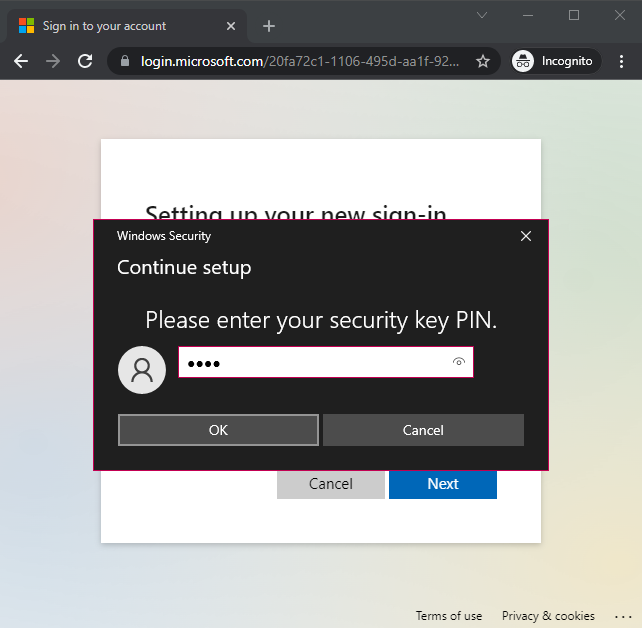
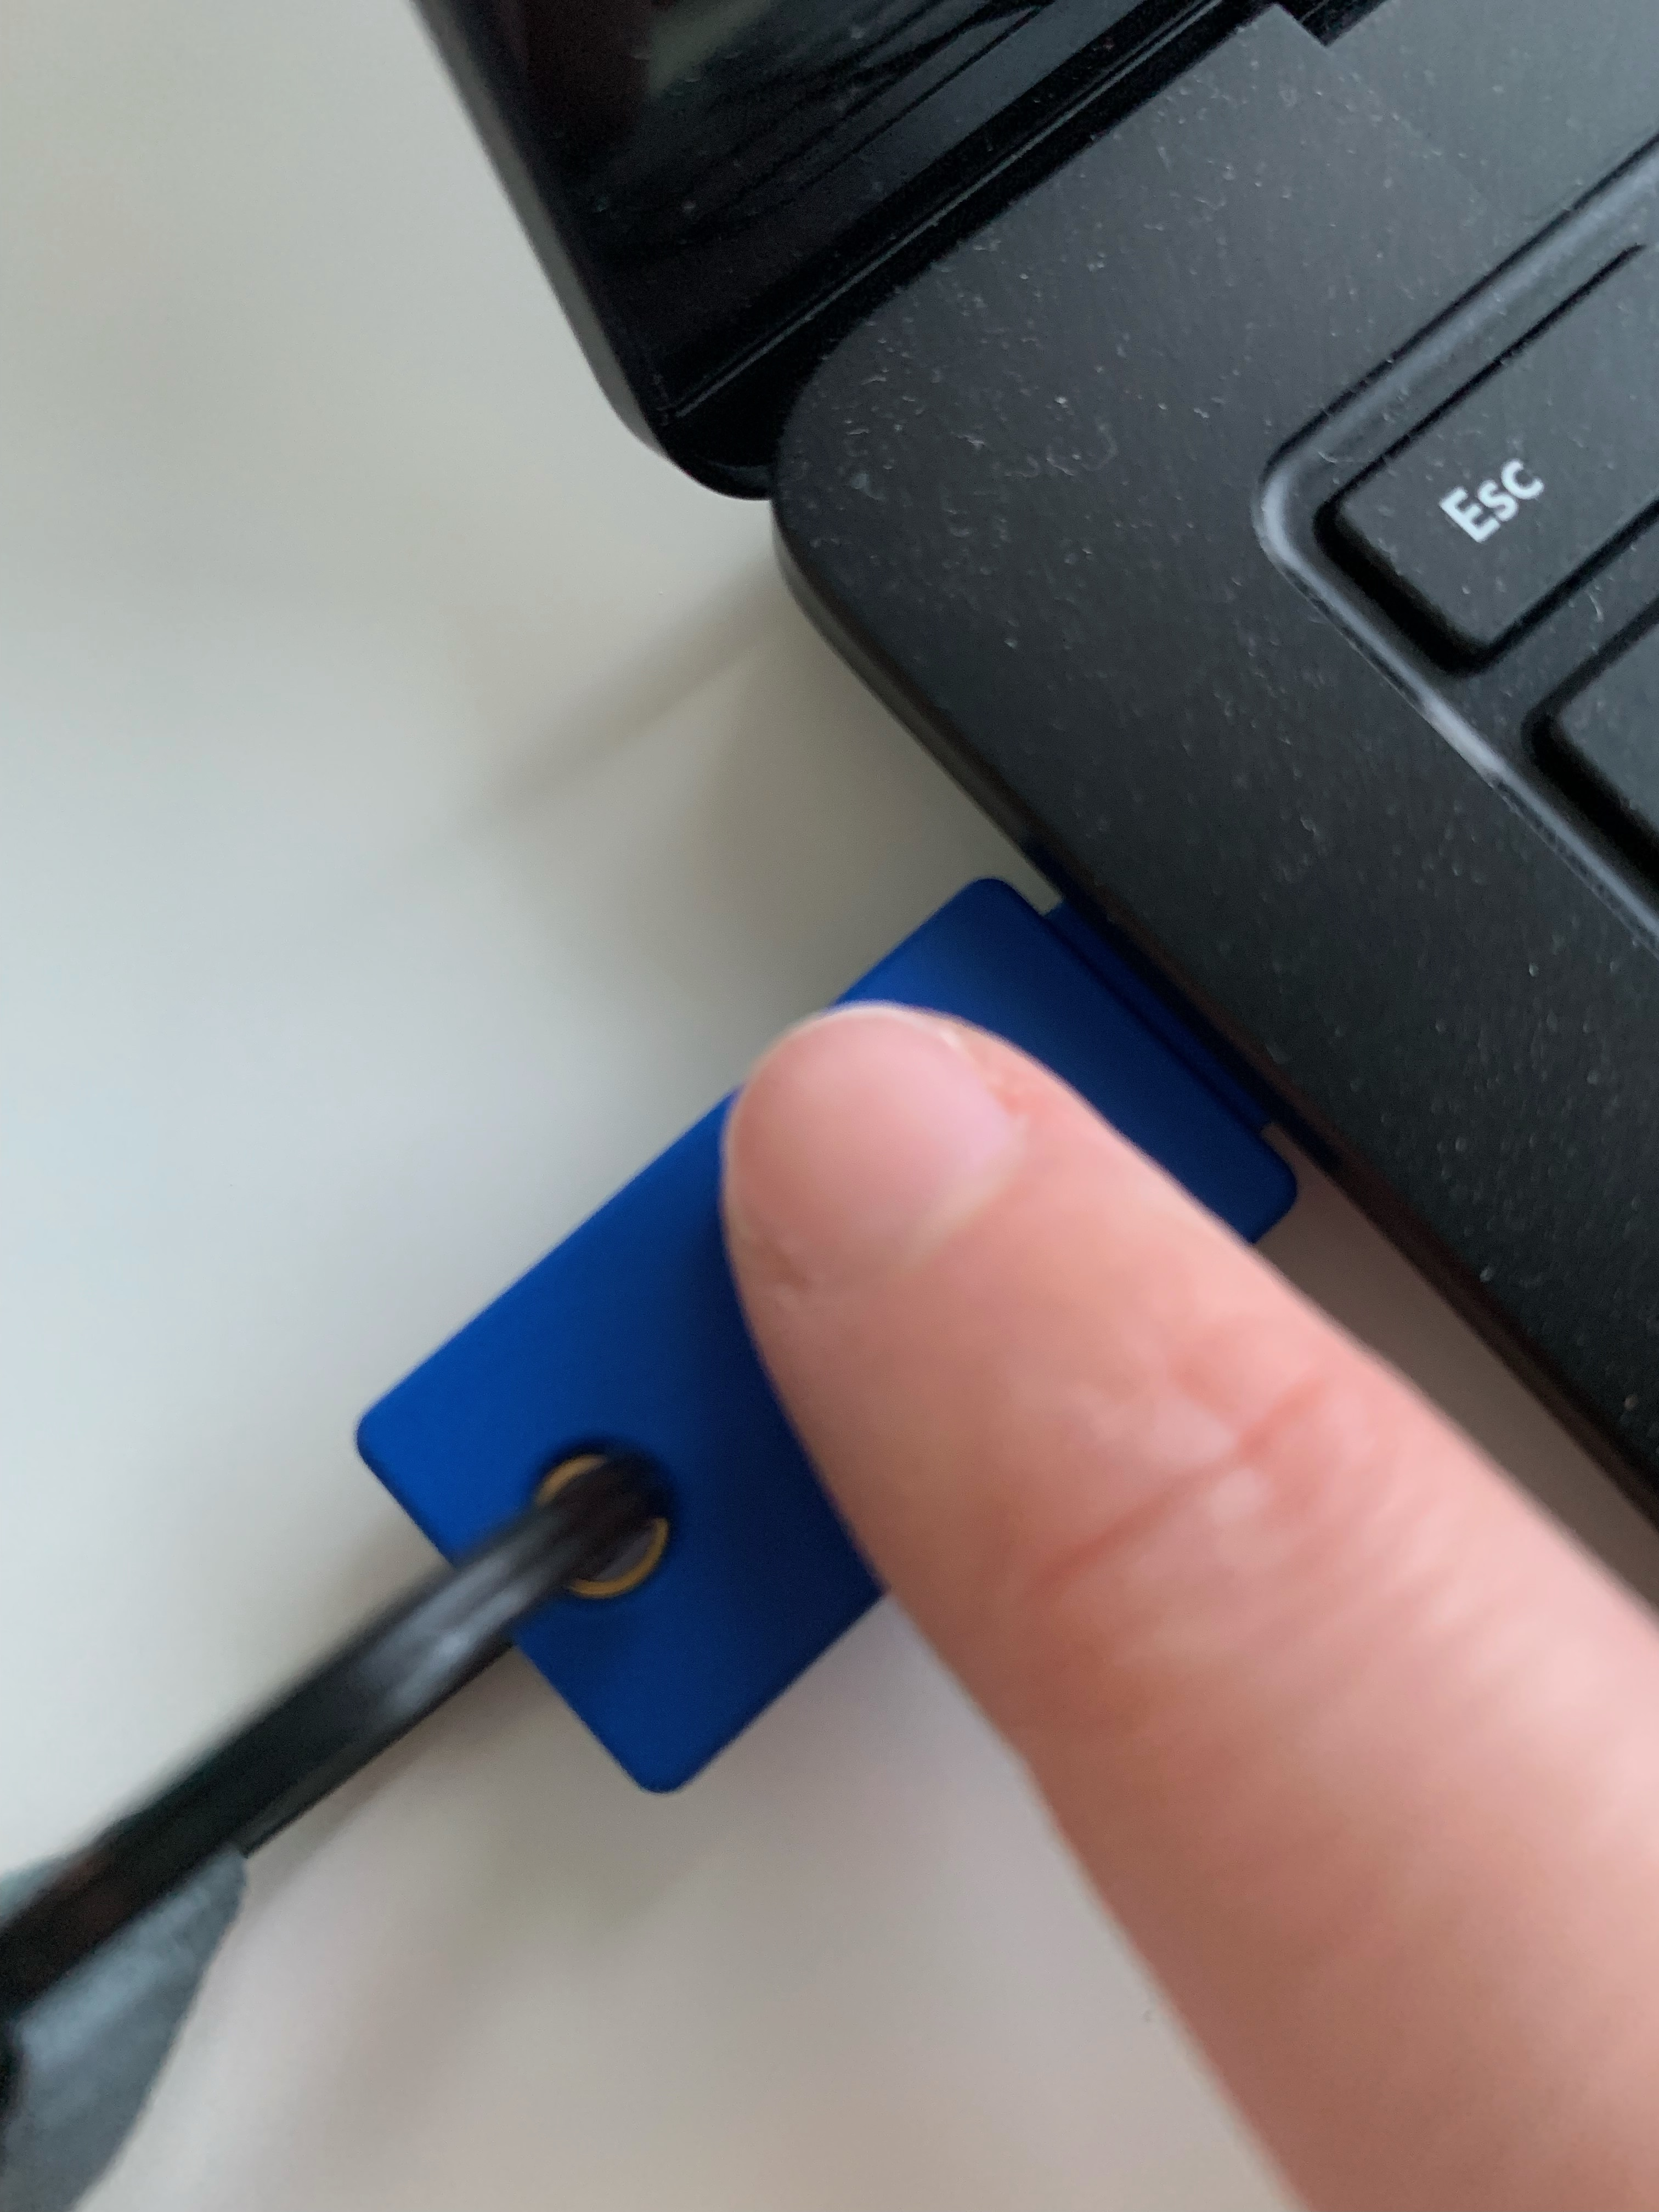
- You will be prompted to touch your security key to complete the setup.
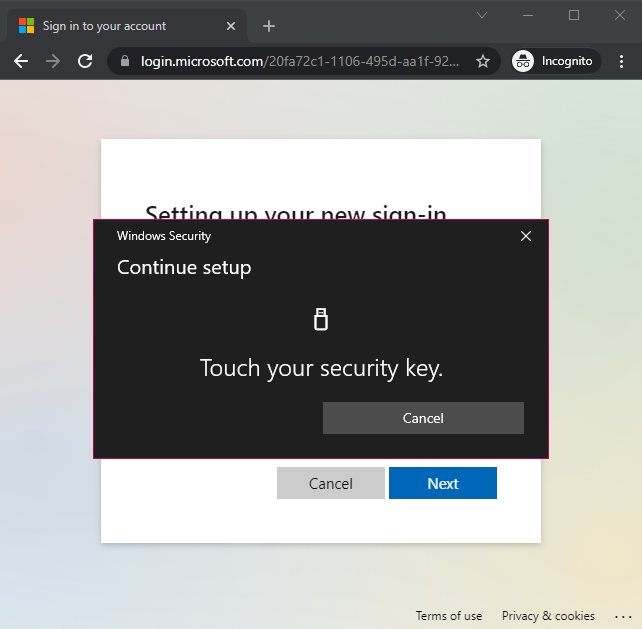
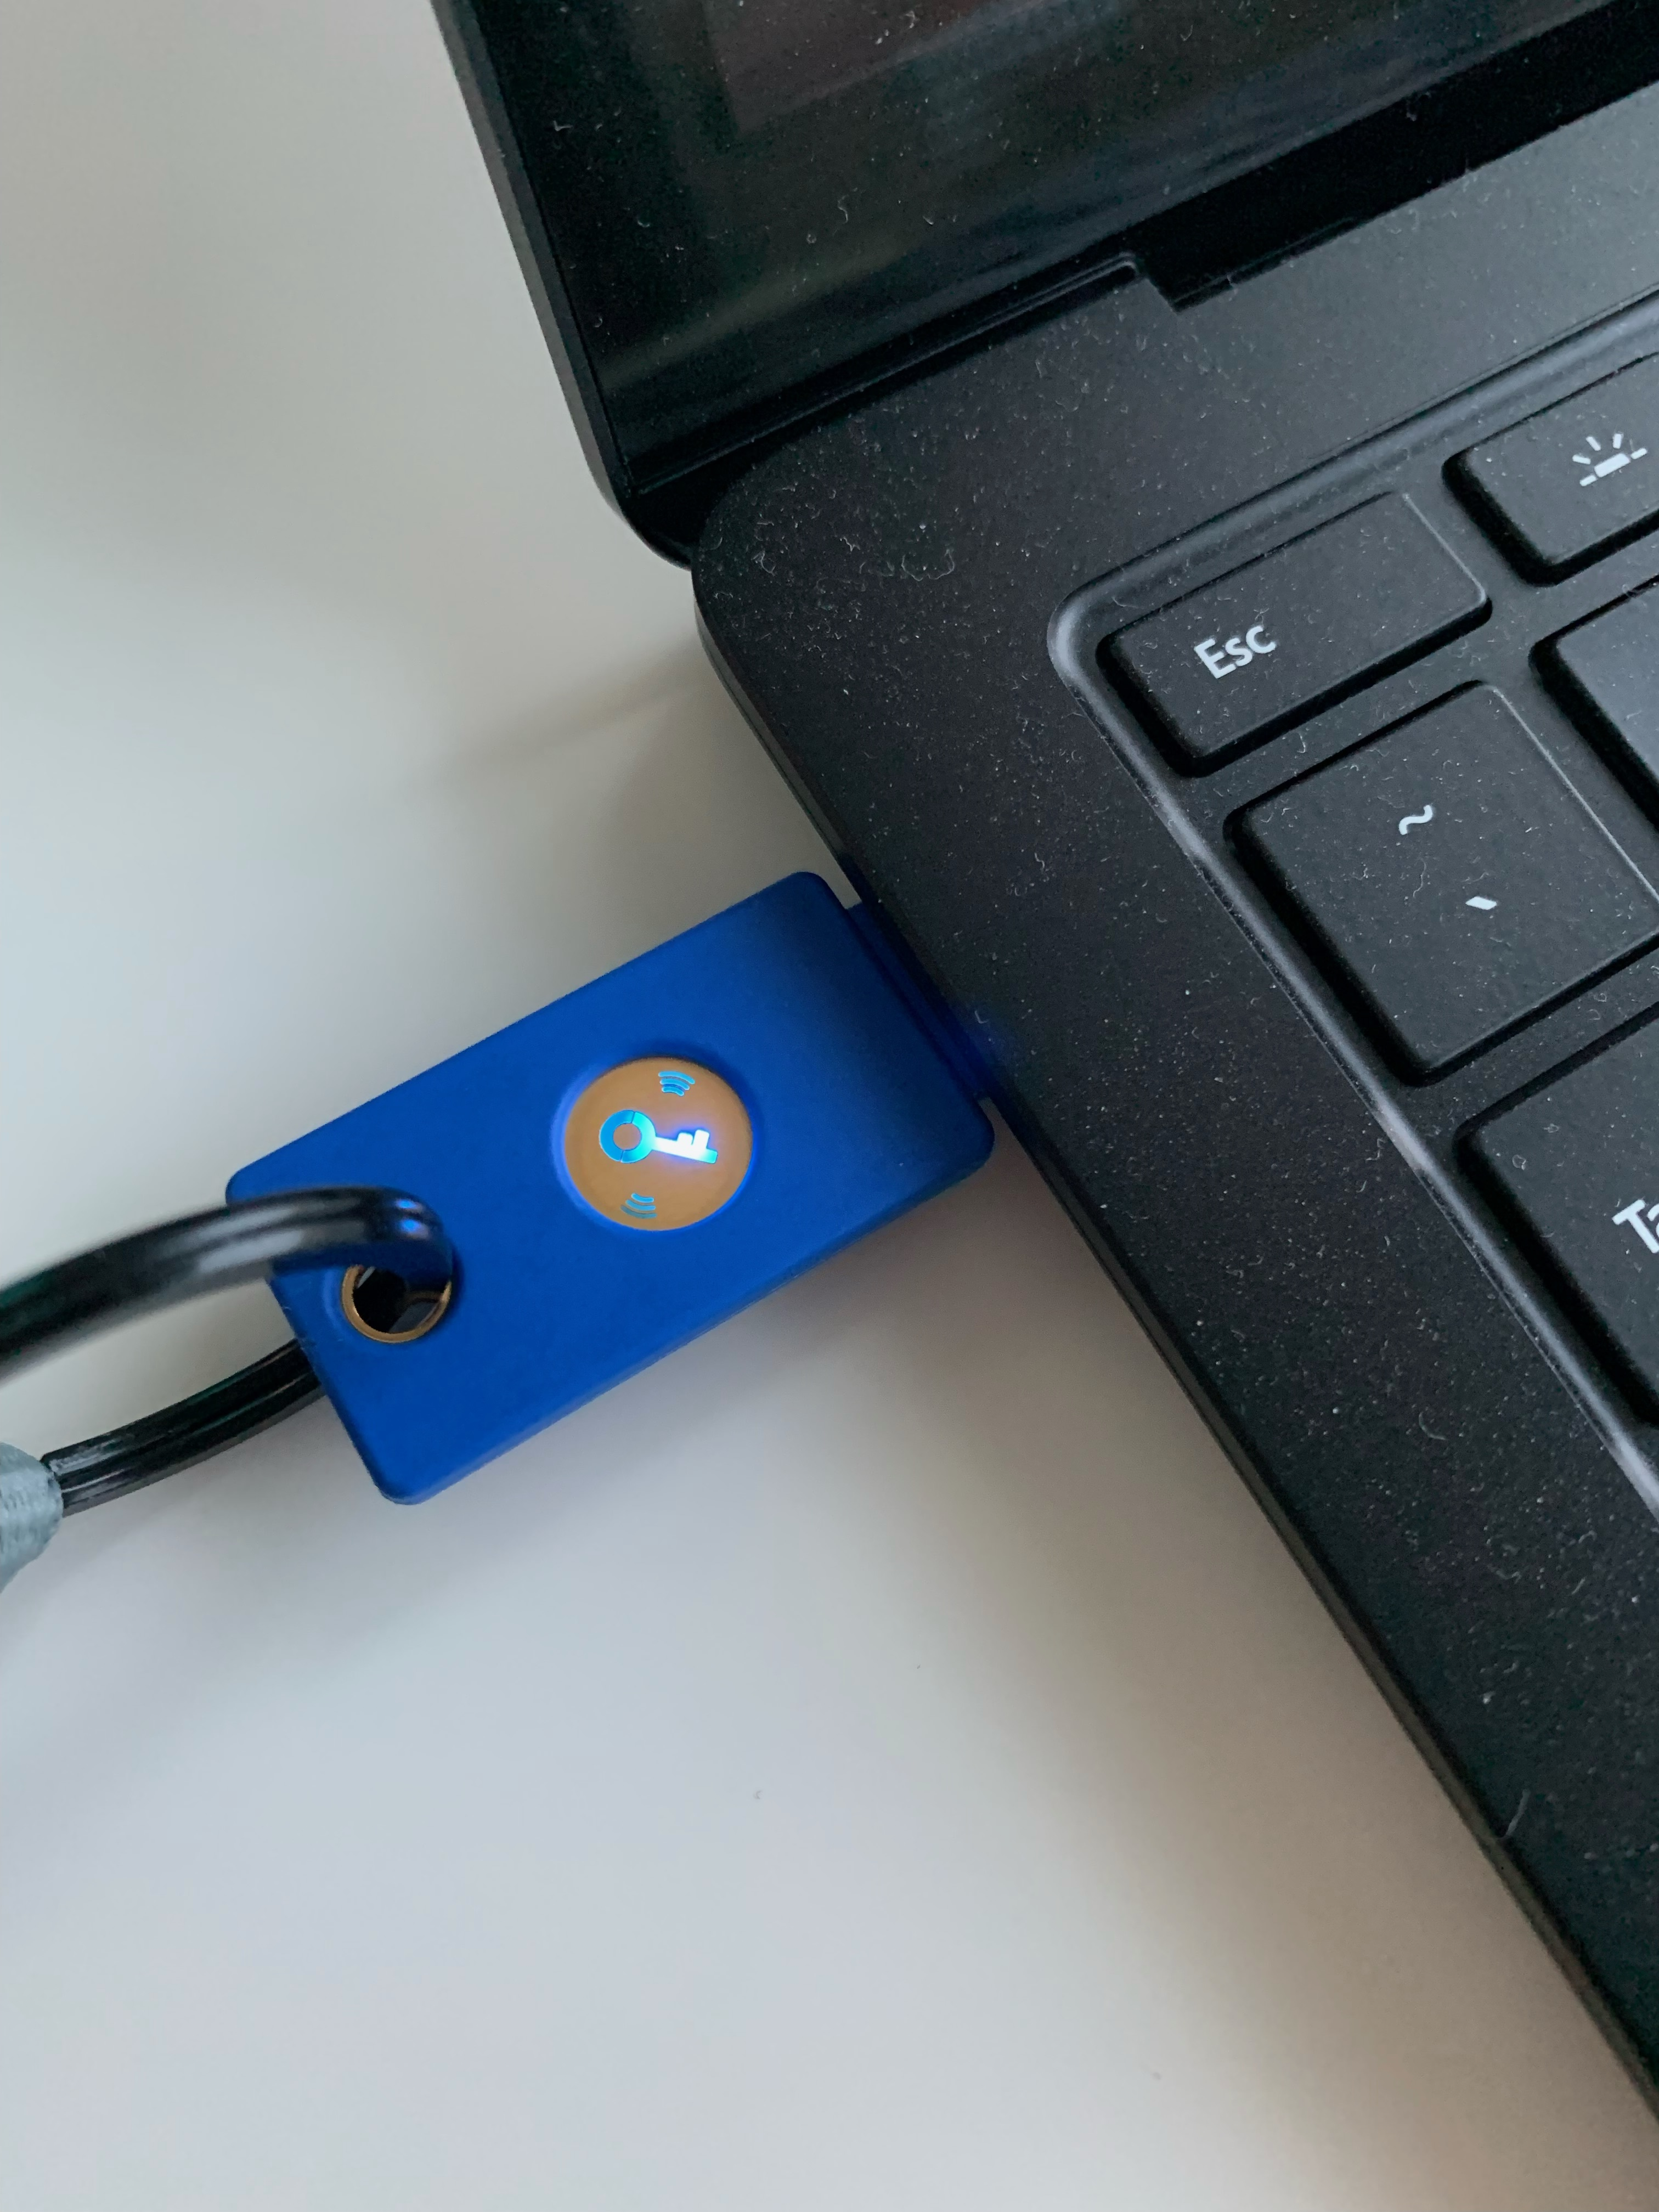
- Your key may light up / flash to indicate that you should touch it to proceed. Find the circle with the key icon on your key and touch it.
- You will be asked to create a name for you security key. Enter a name in the text box and click Next.
Note: If you lose your security key, you will want to remove it as an authentication method, so make sure to pick a memorable name that relates to the key, model, or date you added the key. Naming your key is also helpful to keep track in case you have multiple keys that you enroll for authentication.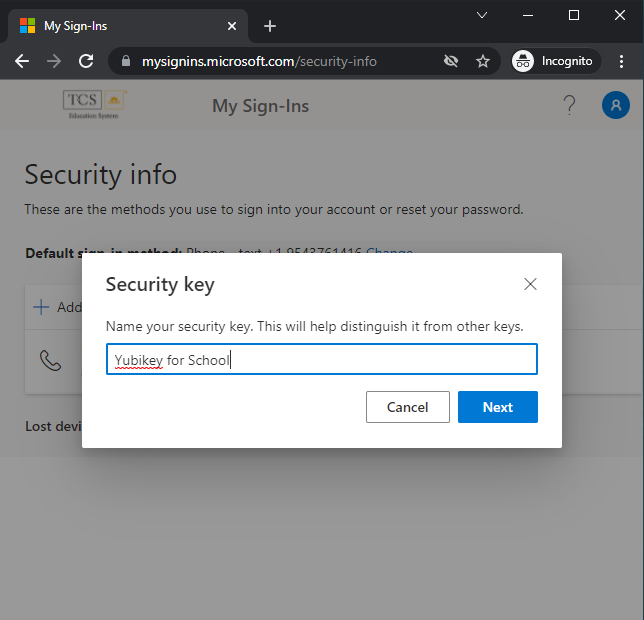
- You will receive a confirmation that the key has been added. Click Done.
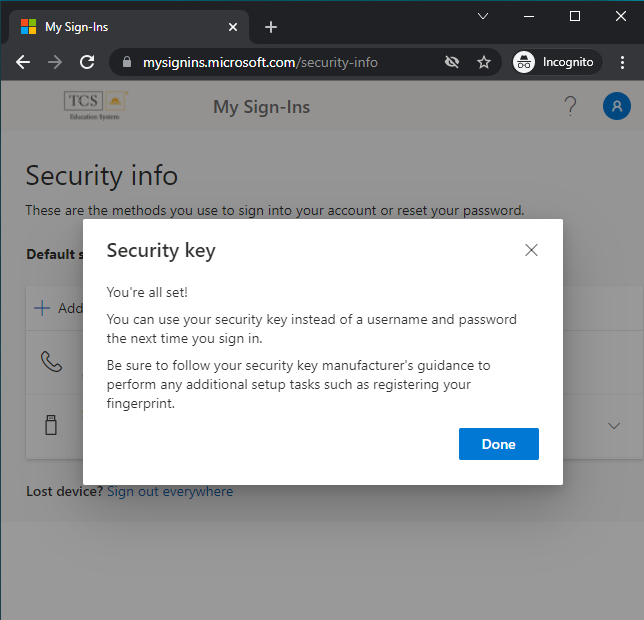
- You should now see Security Key as a method listed in the Security Info page. This means that you will have the option to sign in through touching your security key and entering your PIN when you sign into your account with MFA.

- When you are finished, you may close this page.